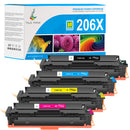
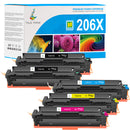
Related Products
Compatible Printers
HP Color LaserJet Pro
HP Color LaserJet Pro MFP
01. Great Value for Excellent Performance
Why not spend less money to get the same page yield as the original HP toner cartridge?
02. Clear and Vivid Printing
True Image compatible 206A and 206X toner cartridges save you from the awkwardness of unclear page contents and ensures printing crisp text documents.

03. High Printer Compatibility
HP Color LaserJet Pro
HP Color LaserJet Pro M255dw
HP Color LaserJet Pro MFP M282nw
HP Color LaserJet Pro MFP M283fdw
HP Color LaserJet Pro M255 Series
HP Color LaserJet Pro MFP M282 Series
HP Color LaserJet Pro MFP M283 Series
04. Industry-leading Components
Ensure clear and crisp printouts that you can rely on.
05. Eco-friendly & Qualified Products
True Image 206A and 206X compatible toner cartridges are made with the highest quality new components in ISO9001/ ISO14001 certified factories, giving you peace of mind while enjoying the huge savings.
06. Your Printer Toner Experts
From product selection to post-sale service, we are with you every step of the way to assist, whether it's from a phone call, email or live chat.
Instructions For Use
step 01
Ready the required tools.
step 02
Remove the chip from your original HP cartridge.
A. Reset the chip recycle drill by rotating its handle counterclockwise until the drill is not in the red shown.
B. Install the drill on where the toner chip is located as shown.
C. Make sure the drill is installed in place.
D. Rotate the handle of the drill clockwise.
E. The chip will be pushed out of the chip slot.
F. Remove the chip
G. Use diagonal cutting pliers to cut off the residual plastic or glue (if necessary).
H. Reset the chip recycle drill again and remove it from the cartridge.
step 03
If you using 3rd-party compatible cartridges, please follow below steps to get the chip.
A: Use diagonal cutting pliers to cut off the residual plastic securing the chip.
B: Use tweezers to take out the chip.
step 04
Install the chip into the new cartridge.
A: Remove the endplate ( chip slot ) outwards from our new cartridge.
B: Using tweezers, install the chip into the slot and push it flush against the end of the slot. Make sure the orientation of the chip is the same as in the photo above. Also, verify the orientation of the endplate as shown in the picture.
C: AIignt the endplate ( with the chip ) with the cartridge and firmly push to install it. There will be a plastic snap sound When the installation is completed.
D: Double-check the orientation of the chip and the position of the chip slot. Make sure they are installed correctly.
step 05
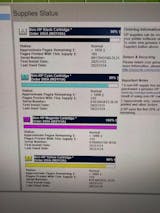
After installing the cartridge, the printer will display a warning message, as in the photos shown. Please note, the warning message will not interfere with the printing process, and you may disregard it."
step 06
When printing, a pop-up warning message will be displayed on your computer screen. To disable the message, click the "Snooze" button and select "2 Months" from the dropdown menu. The message will be disabled for a selected period.
Instructions For Use
Remove the chip from your original HP cartridge.
A. Reset the chip recycle drill by rotating its handle counterclockwise until the drill is not in the red shown.
B. Install the drill on where the toner chip is located as shown.
C. Make sure the drill is installed in place.
D. Rotate the handle of the drill clockwise.
E. The chip will be pushed out of the chip slot.
F. Remove the chip
G. Use diagonal cutting pliers to cut off the residual plastic or glue (if necessary).
H. Reset the chip recycle drill again and remove it from the cartridge.
If you using 3rd-party compatible cartridges, please follow below steps to get the chip.
A: Use diagonal cutting pliers to cut off the residual plastic securing the chip.
B: Use tweezers to take out the chip.
Install the chip into the new cartridge.
A: Remove the endplate ( chip slot ) outwards from our new cartridge.
B: Using tweezers, install the chip into the slot and push it flush against the end of the slot. Make sure the orientation of the chip is the same as in the photo above. Also, verify the orientation of the endplate as shown in the picture.
C: AIignt the endplate ( with the chip ) with the cartridge and firmly push to install it. There will be a plastic snap sound When the installation is completed.
D: Double-check the orientation of the chip and the position of the chip slot. Make sure they are installed correctly.
After installing the cartridge, the printer will display a warning message, as in the photos shown. Please note, the warning message will not interfere with the printing process, and you may disregard it."
When printing, a pop-up warning message will be displayed on your computer screen. To disable the message, click the "Snooze" button and select "2 Months" from the dropdown menu. The message will be disabled for a selected period.